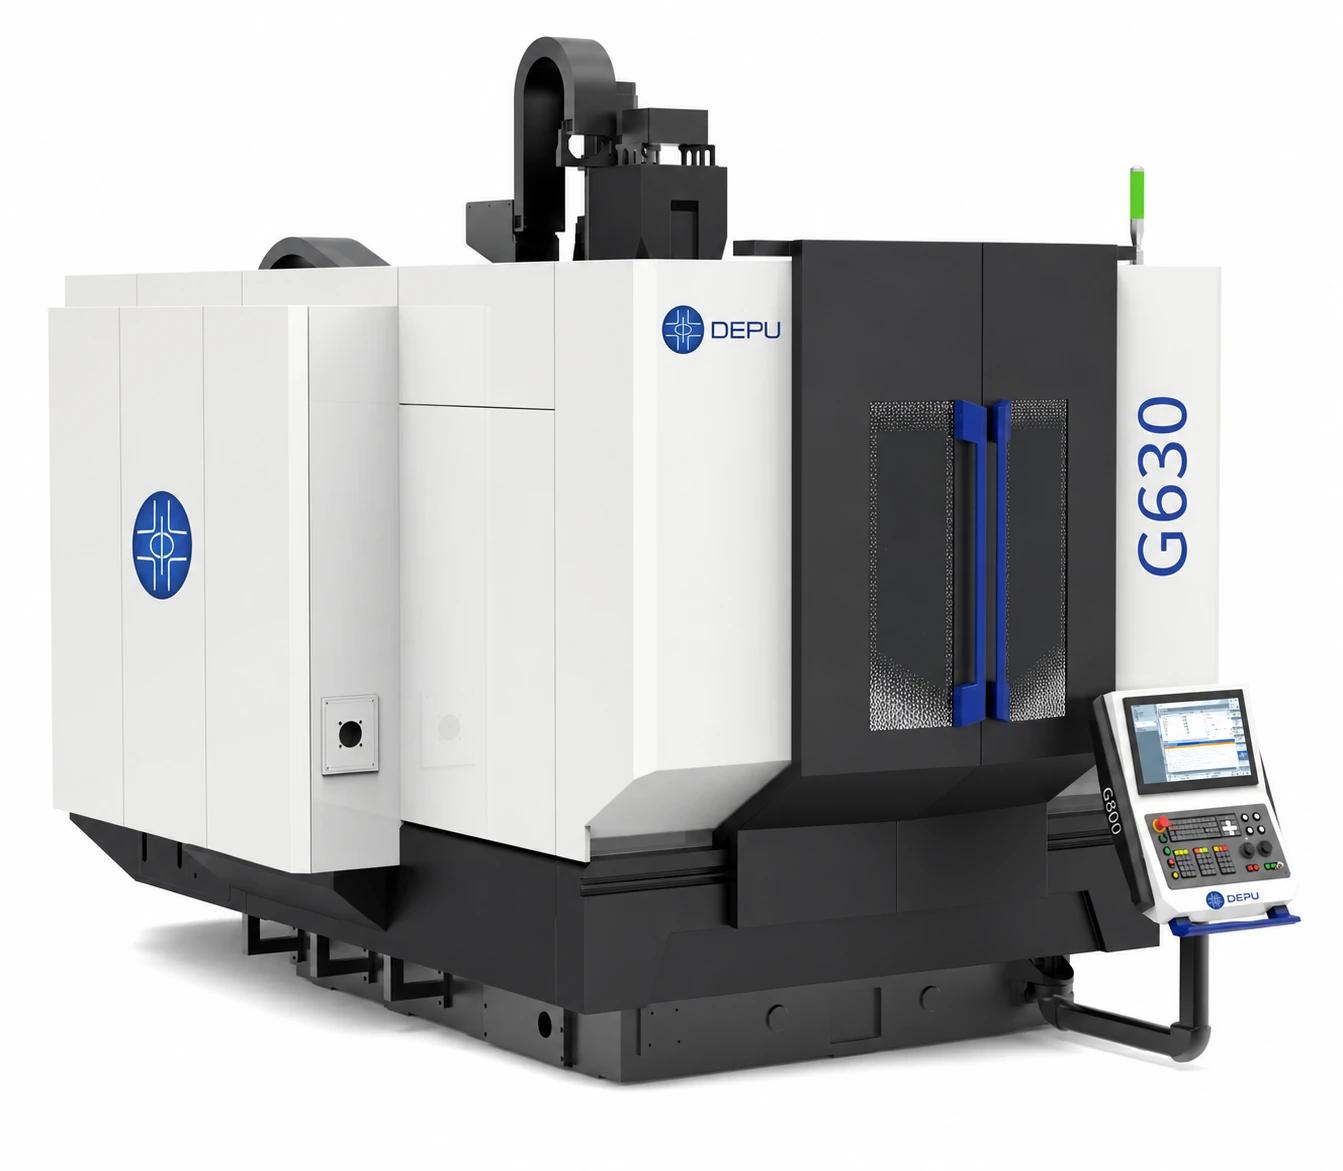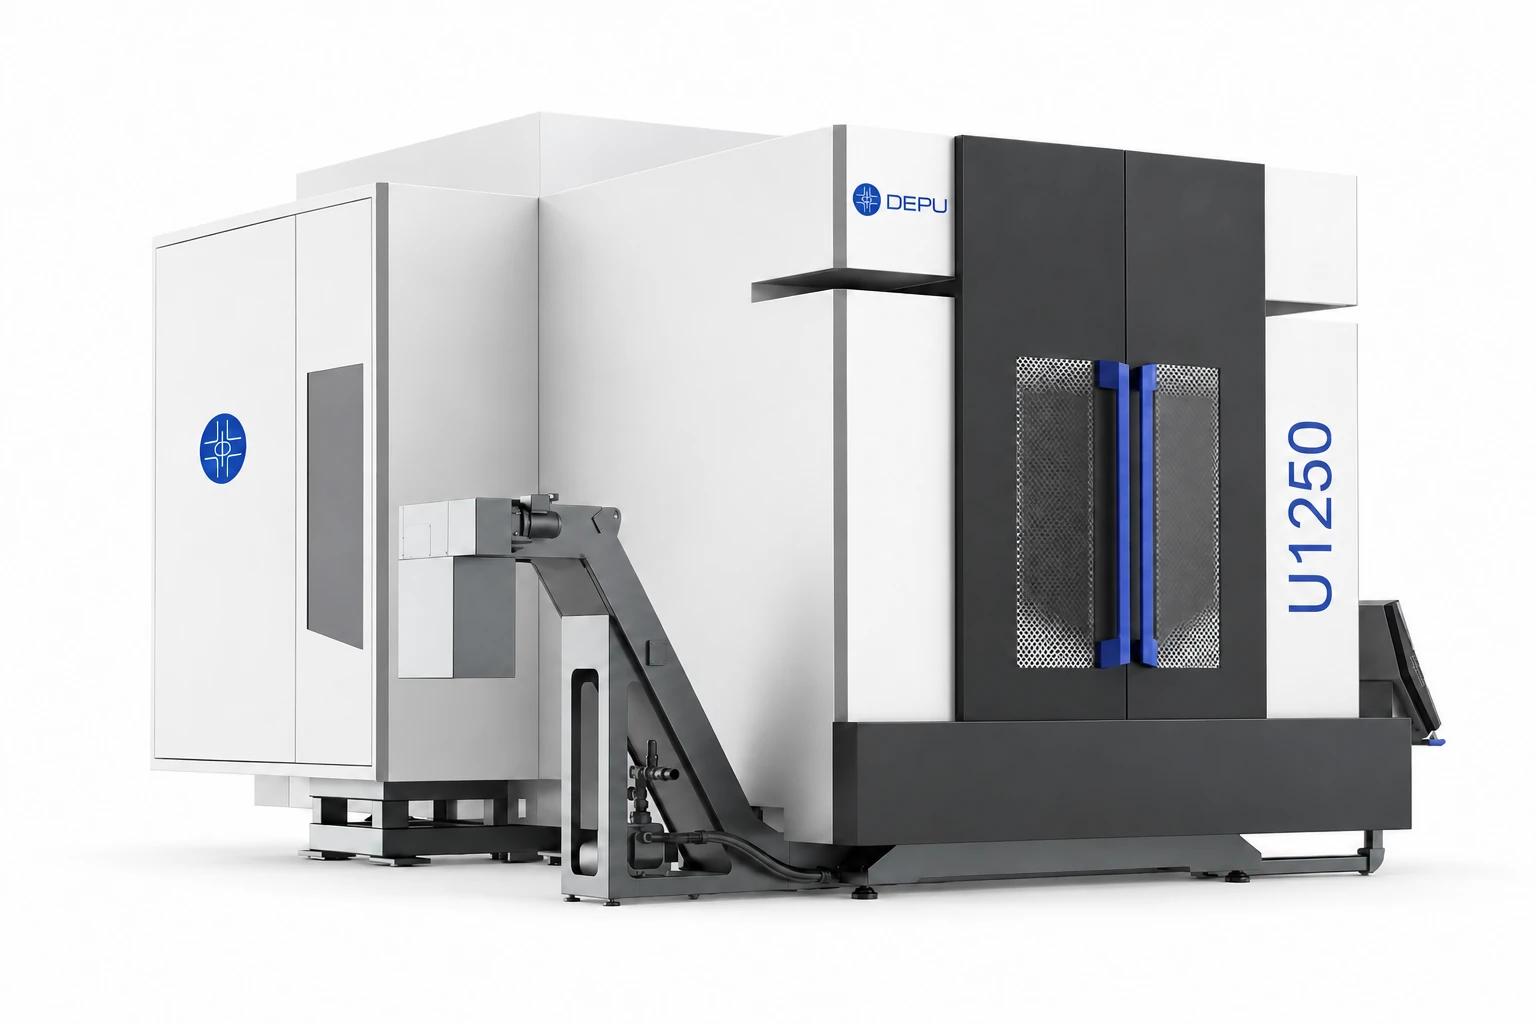
3-axis CNC milling machine uses three linear movements—X, Y, and Z—to machine a workpiece with a rotating cutting tool. It can handle a wide range of common manufacturing operations, including facing, drilling, slotting, pocketing, and contour milling. If your parts have features that are accessible from a fixed tool direction, a 3-axis machine can be a practical and cost-effective choice. However, if you regularly manufacture components with multiple angled surfaces, complex contours, or features that require repeated repositioning, a 4-axis or 5-axis CNC machining center may be worth considering.
What Is a 3-Axis CNC Milling Machine?
A 3-axis CNC milling machine is a computer-controlled machine tool that moves a cutting tool or workpiece along three linear axes: X, Y, and Z. The rotating cutting tool removes material according to a programmed toolpath, allowing you to produce features such as flat surfaces, holes, slots, pockets, and contours.
In a conventional 3-axis setup, the tool approaches the workpiece from a fixed orientation while the machine coordinates movement along the three linear axes. Unlike a multi-axis machine, it does not use additional controlled rotary axes to automatically change the tool or workpiece orientation during machining.
Understanding the X, Y, and Z Axes
The three axes describe the machine’s linear movements:
-
X-axis: Left-to-right movement.
-
Y-axis: Front-to-back movement.
-
Z-axis: Up-and-down movement.
Together, these movements allow the cutting tool to reach different positions within the machine’s working envelope.
The exact movement arrangement depends on the machine design. On some machines, the worktable moves along one or more axes while the spindle assembly moves along others. On other designs, more of the movement comes from the spindle head.
Main Components of a 3-Axis CNC Milling Machine
A typical 3-axis CNC milling machine includes several key components:
-
Machine frame and base: Support the machine structure and help maintain stability during machining.
-
Worktable: Holds the workpiece, fixture, or vise.
-
Spindle: Rotates the cutting tool at the selected speed.
-
Cutting tools: Remove material to create the required geometry.
-
Guideways and drive systems: Control movement along the three linear axes.
-
CNC controller: Executes the machining program and coordinates machine movements.
-
Tool magazine and automatic tool changer: Available on many machining centers to support automatic tool changes.
The quality and configuration of these components influence the machine’s working capacity, cutting performance, accuracy, and suitability for different production requirements.
How Does a 3-Axis CNC Milling Machine Work?
A 3-axis CNC milling machine follows programmed instructions to move the cutting tool relative to the workpiece. The controller coordinates the X, Y, and Z movements while the spindle rotates the tool at the required speed.
A typical machining process involves the following steps.
Step 1: Prepare the Part Design
Start with a CAD model or engineering drawing that defines the part’s dimensions, geometry, tolerances, and required features.
The design needs to provide enough information for the programmer to determine how the part will be held and machined.
Step 2: Create the CNC Toolpath
CAM software converts the part geometry into machining operations and toolpaths.
Depending on the part, these may include:
-
Face milling
-
Pocket milling
-
Slot milling
-
Drilling and boring
-
Contour milling
-
Chamfering and finishing
The programmer selects suitable cutting tools, speeds, feeds, cutting depths, and machining strategies based on the material and required results.
Step 3: Secure the Workpiece
Mount the material on the machine table using a vise, fixture, clamps, or another suitable workholding system.
Proper workholding is essential. The part must remain secure under cutting forces, and its position must be accurately established relative to the machine’s coordinate system.
Step 4: Set Up the Machine and Run the Program
Install the required tools, establish work coordinates, check the program, and verify the setup.
The CNC controller then coordinates the three linear axes and spindle according to the programmed toolpath.
Step 5: Machine and Inspect the Part
The cutting tool removes material until the required geometry is produced. Depending on the operation, the process may involve roughing, semi-finishing, and finishing passes.
After machining, inspect critical dimensions and surface features against the engineering drawing.
The quality of the finished part depends on more than the machine’s axis count. Tool selection, workholding, machine condition, programming, material behavior, and inspection methods all contribute to the result.
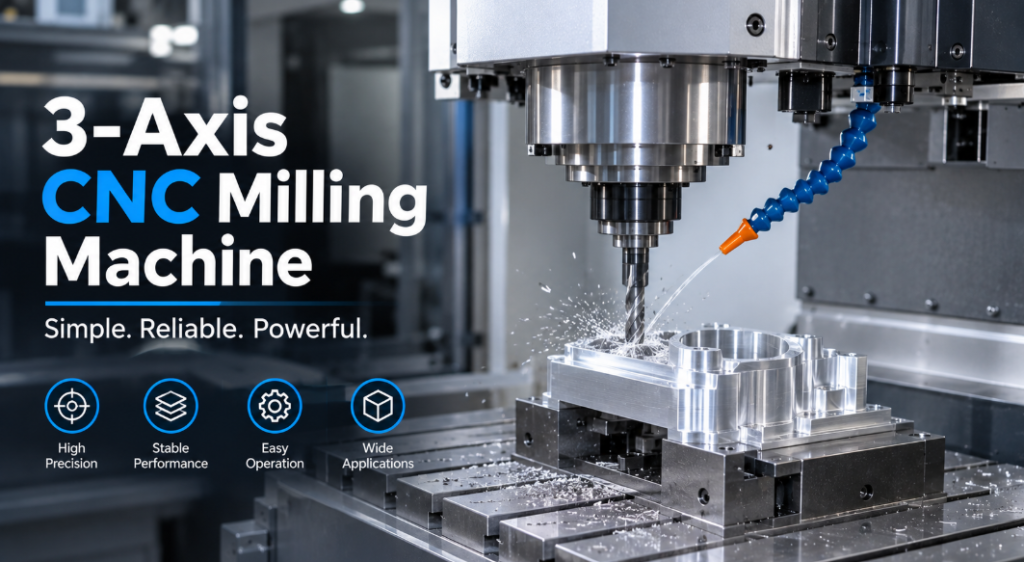
What Can a 3-Axis CNC Milling Machine Make?
A 3-axis CNC milling machine can produce a wide range of components, particularly when their features are accessible from the spindle’s working direction.
Typical examples include:
| Part Type | Common Machining Operations |
|---|---|
| Mounting plates | Face milling, drilling, tapping, and pocketing |
| Brackets | Milling, slotting, drilling, and contouring |
| Housings and enclosures | Pocket milling, hole machining, and surface finishing |
| Fixtures and tooling components | Milling, boring, drilling, and profiling |
| Mold bases | Facing, pocketing, and drilling |
| Flat structural components | Surface milling, contouring, and hole patterns |
A part does not have to be completely flat to be suitable for 3-axis machining. Many components with pockets, steps, curved profiles, and multiple features can be produced efficiently using suitable toolpaths and workholding.
The main consideration is whether the cutting tool can reach the required features without unacceptable interference or excessive repositioning.
What Materials Can You Machine?
The materials you can process depend on the machine’s spindle capability, rigidity, cutting tools, workholding, and machining parameters.
Common materials used in 3-axis CNC milling include:
-
Aluminum: Widely used for housings, brackets, plates, and lightweight components.
-
Carbon and alloy steels: Used for structural parts, tooling, and industrial components.
-
Stainless steel: Used in applications requiring corrosion resistance and specific mechanical properties.
-
Copper and brass: Common in electrical components, fittings, and precision parts.
-
Engineering plastics: Used for housings, prototypes, and specialized industrial components.
Some applications also involve titanium alloys and other difficult-to-machine materials. These require careful consideration of spindle torque, cutting conditions, tool selection, heat management, and machine rigidity.
A machine’s ability to move along three axes does not determine which materials it can cut. Evaluate its complete technical specifications against the materials and cutting operations in your production process.
Advantages and Limitations of 3-Axis CNC Milling
Three-axis CNC milling remains widely used because it handles many everyday machining tasks without the additional complexity of rotary-axis systems. However, its limitations become more important as part geometry and setup requirements become more demanding.
Advantages of 3-Axis CNC Milling
1. Straightforward programming and operation
Three-axis machining generally involves simpler toolpath planning than simultaneous multi-axis machining. This can make programming, setup, and operator training more manageable.
2. Cost-effective for conventional parts
If your components can be machined from one primary direction, a 3-axis machine may avoid the added investment and programming requirements of a multi-axis system.
3. Suitable for a broad range of machining operations
You can use a 3-axis machine for facing, drilling, pocketing, contouring, slotting, and many other common milling operations.
4. Flexible workholding options
A variety of vises, clamps, fixtures, and custom workholding systems can be used to secure different types of workpieces.
5. Practical for many production environments
For parts with accessible features and repeatable setups, 3-axis machining can provide a straightforward production process.
Limitations of 3-Axis CNC Milling
1. Additional setups for multi-face machining
A conventional 3-axis machine typically approaches the workpiece from a fixed tool direction. If you need to machine several sides, you may have to remove, rotate, and reclamp the part.
Each additional setup takes time and requires accurate repositioning.
2. Limited access to angled features
Features that are not accessible from the spindle’s normal direction may require angled fixtures, special tooling, or another setup.
3. Challenges with deep cavities
Deep pockets and cavities can require long cutting tools. Longer tool assemblies may be more susceptible to deflection and vibration, depending on the cutting conditions.
4. More demanding machining of complex surfaces
Some freeform surfaces and compound-angle features require the cutting tool to change orientation continuously. A conventional 3-axis machine cannot provide this movement through its three linear axes alone.
5. Potential setup-related accuracy issues
When you reposition a part, you introduce another opportunity for alignment errors. This can be particularly important when features on different faces must maintain tight positional relationships.
These limitations do not mean a 3-axis machine cannot produce complex parts. Skilled programmers can use specialized fixtures, multiple setups, and suitable machining strategies to handle many challenging geometries. The question is whether that approach remains efficient and repeatable for your production needs.
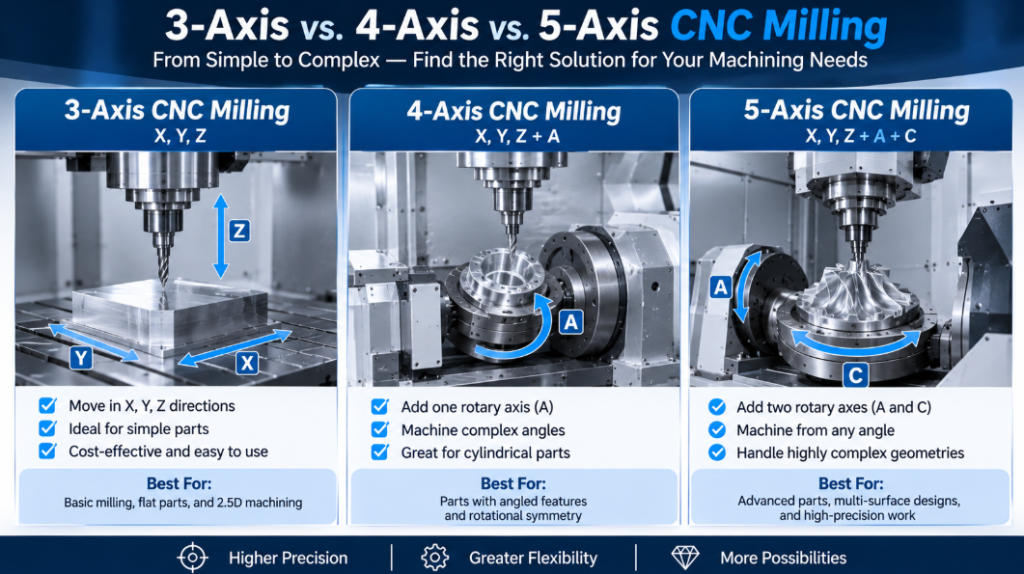
3-Axis vs. 4-Axis vs. 5-Axis CNC Milling
The main difference between 3-axis, 4-axis, and 5-axis CNC milling is the number and type of controlled movements available during machining.
A 3-axis machine uses three linear axes. A 4-axis machine adds one rotary axis, while a 5-axis machine adds two rotary axes to the three linear axes. The rotary axes may position the workpiece, the tool, or both, depending on the machine’s design.
| Comparison | 3-Axis CNC | 4-Axis CNC | 5-Axis CNC |
|---|---|---|---|
| Axis configuration | 3 linear axes | 3 linear + 1 rotary axis | 3 linear + 2 rotary axes |
| Tool or workpiece orientation | Typically fixed during cutting | Can rotate around one additional axis | Can be positioned in two rotary directions |
| Multi-face machining | Often requires additional setups | Can access more faces through rotary positioning | Can provide greater access to multiple faces and angles |
| Complex contours | Suitable for accessible geometry | Suitable for certain rotary and angled features | Better suited to complex surfaces requiring changing tool orientation |
| Programming requirements | Generally simpler | More involved than 3-axis | Typically more demanding |
| Typical applications | Plates, brackets, pockets, and housings | Cylindrical parts and indexed multi-face features | Complex aerospace, medical, mold, and precision components |
This is a general comparison, not a guarantee of what every machine can do. Actual capabilities depend on the machine’s kinematics, working envelope, controller, tooling, and workholding.
What Is the Difference Between 3+2 and Simultaneous 5-Axis Machining?
Not every 5-axis operation requires all five axes to move continuously during cutting. Understanding the difference between 3+2 machining and simultaneous 5-axis machining can help you avoid purchasing more capability than your parts require.
3+2-axis machining
In 3+2 machining, two rotary axes position the workpiece or tool at a selected angle. Once the orientation is set, the rotary axes remain stationary while the machine performs the cutting operation using three linear axes.
This approach can be useful when you need to machine several faces or angled features without manually repositioning the part for every operation.
Typical applications include:
-
Angled holes
-
Multi-face housings
-
Brackets with compound-angle features
-
Components with several fixed machining orientations
Simultaneous 5-axis machining
In simultaneous 5-axis machining, the three linear axes and two rotary axes can move together during cutting.
This allows the tool orientation to change continuously as it follows the programmed toolpath. It is particularly useful for complex freeform surfaces, impellers, blades, and other geometries that cannot be machined effectively with fixed tool orientations.
However, simultaneous 5-axis machining requires more advanced CAM programming, post-processing, collision checking, and machine setup.
Which one do you need?
If your parts mainly require machining several fixed faces or angled holes, 3+2 positioning may be sufficient. If the cutting tool needs to change orientation continuously along a complex surface, simultaneous 5-axis machining may be necessary.
Make this decision based on your actual part geometry and machining strategy, not simply the number of axes listed in a machine specification. Siemens’ milling technology documentation also distinguishes indexed 3+2 machining from simultaneous 5-axis machining and emphasizes evaluating cost-effectiveness against workpiece geometry and machine kinematics.
When Should You Upgrade from 3-Axis to 5-Axis CNC Machining?
Upgrading to a 5-axis CNC machining center makes sense when the additional rotary movement solves a real production problem. It is not automatically the best choice for every part or manufacturing operation.
Here are several situations where you should consider moving beyond conventional 3-axis machining.
1. Your Parts Require Machining on Multiple Sides
If a component requires machining on several faces, a 3-axis process may involve repeated unclamping, repositioning, and alignment.
A suitable 5-axis machine can often reach multiple faces in fewer setups. This may reduce handling time and help maintain the positional relationships between features.
For example, a complex housing with holes and machined surfaces on several angled faces may benefit from rotary-axis positioning. However, the result depends on the machine’s rotary-axis travel, fixture design, and access to the required surfaces.
2. You Produce Parts with Compound Angles
Some parts contain holes, slots, or surfaces that are not aligned with the primary X, Y, and Z directions.
A 3-axis machine may require special fixtures or multiple setups to reach these features.
With a 5-axis machining center, you can position the tool or workpiece at different angles, making certain operations more accessible.
3. You Machine Complex Curved Surfaces
Components such as turbine blades, impellers, and specialized medical or aerospace parts can contain continuously changing surface geometry.
A 3-axis machine may struggle to maintain a suitable tool orientation across these surfaces.
Simultaneous 5-axis machining allows the cutting tool to change orientation during the operation, providing greater flexibility for complex contours.
4. Long Cutting Tools Are Affecting Your Process
Deep cavities may require long tools on a 3-axis machine. Depending on the geometry, this can increase tool deflection and vibration.
A suitable 5-axis configuration may allow you to tilt the tool or workpiece and use a shorter cutting tool.
Whether this improves the process depends on the machine configuration, available clearance, tool geometry, and cutting conditions.
5. Repeated Setups Are Increasing Production Costs
If your production process involves several fixtures and manual repositioning operations, calculate the total time and cost involved.
Include:
-
Workpiece loading and unloading
-
Fixture preparation
-
Alignment and measurement
-
Operator handling
-
Additional inspection
-
Potential rework caused by setup-related errors
A 5-axis machine may reduce some of these costs by consolidating operations into fewer setups. However, you should also account for the higher equipment investment, programming requirements, and maintenance costs.
When Is Staying with 3-Axis the Better Choice?
You may not need a 5-axis machine if:
-
Your parts are mainly flat or prismatic.
-
Most features are accessible from one direction.
-
Your existing fixtures allow repeatable multi-face machining.
-
Your production volume and part complexity do not justify additional machine capability.
-
Your operators and programming workflow are already efficient with 3-axis equipment.
The right decision is the one that delivers the required part quality and production economics—not necessarily the machine with the highest axis count.
How to Choose the Right CNC Milling Machine for Your Business
Before purchasing a CNC milling machine, evaluate your production requirements rather than starting with a list of machine specifications.
The following factors can help you compare equipment more effectively.
1. Define Your Workpiece Requirements
Start with the parts you expect to manufacture.
Identify:
-
Maximum workpiece dimensions
-
Part weight
-
Material type
-
Required tolerances
-
Surface finish requirements
-
Number of faces requiring machining
-
Features that need angled or continuous tool access
If you produce several different part families, use representative drawings or 3D models to evaluate the machine’s suitability across your actual workload.
2. Check the Working Envelope and Workpiece Capacity
The machine needs enough travel and clearance to accommodate the workpiece, fixtures, and cutting tools.
Check the following specifications:
-
X, Y, and Z-axis travel
-
Maximum workpiece dimensions
-
Table size and load capacity
-
Spindle-to-table distance
-
Clearance around fixtures and rotary components
-
Tool and workpiece interference limits
For 5-axis equipment, pay particular attention to how the rotary axes affect the usable working envelope. A machine’s nominal travel does not necessarily represent the space available when the workpiece is tilted or rotated.
3. Evaluate Spindle Performance
Spindle speed, power, and torque affect which materials and cutting operations a machine can handle effectively.
Your requirements will vary depending on whether you primarily perform:
-
High-speed machining with smaller cutting tools
-
Heavy material removal
-
Machining of steel or other difficult materials
-
Precision finishing
-
Deep-pocket or long-tool operations
Do not compare machines using maximum spindle speed or power alone. Review the spindle’s performance across its operating range and match it to your actual cutting requirements.
4. Consider Machine Rigidity and Accuracy
Machine structure, guideways, spindle support, rotary assemblies, and thermal behavior all influence machining performance.
When comparing equipment, ask the manufacturer for:
-
Positioning and repeatability specifications
-
Accuracy inspection methods
-
Measurement conditions
-
Thermal compensation capabilities, where applicable
-
Maintenance and calibration requirements
For 5-axis machines, also ask how rotary-axis accuracy and machine kinematics are verified.
A machine’s advertised accuracy should always be understood in the context of its measurement conditions and intended operating environment.
5. Review the CNC Controller and CAM Compatibility
The controller and programming system need to support your machining strategy.
For 5-axis applications, confirm that the controller supports the required rotary-axis functions and machining modes. You should also check:
-
CAM software compatibility
-
Post-processor availability
-
Tool-center-point control, where required
-
Collision detection and simulation workflow
-
Operator training and programming support
A capable machine still needs an appropriate programming and verification process to deliver reliable results.
6. Compare Total Cost of Ownership
The purchase price is only one part of the investment.
Consider the full operating cost, including:
-
Machine purchase and installation
-
Fixtures and workholding
-
Cutting tools and toolholders
-
CAM software and post-processors
-
Operator and programmer training
-
Maintenance and spare parts
-
Production downtime
-
Inspection and quality control
A 5-axis machine may have a higher initial cost but can be economically attractive if it reduces repeated setups or enables production of parts that would otherwise require a more complicated process.
On the other hand, if most of your work consists of straightforward 3-axis operations, a more advanced machine may add cost without delivering enough practical value.
7. Ask for a Part-Based Machining Evaluation
One of the most useful steps before purchasing is to provide the manufacturer with actual part drawings or 3D models.
Ask for an evaluation that covers:
-
Which features can be completed with 3-axis machining?
-
Which operations require additional setups?
-
Would 3+2 positioning be sufficient?
-
Is simultaneous 5-axis machining necessary?
-
What workholding and tooling would be required?
-
Can the proposed machine accommodate the part’s size and weight?
-
What programming, inspection, and operator skills are needed?
This approach gives you a more meaningful comparison than choosing equipment based on axis count or headline specifications alone.
Final Thoughts
A 3-axis CNC milling machine is a practical solution for a wide range of manufacturing operations, from simple plates and brackets to more involved components with accessible pockets, holes, and contours. Its relatively straightforward programming and operation make it a strong option when your parts do not require frequent changes in tool orientation.
As production requirements become more complex, repeated setups, limited tool access, and difficult surface geometry may make multi-axis machining worth considering.
Before choosing your next machine, review your actual part drawings, material requirements, tolerances, setup strategy, and production costs. Then compare 3-axis, 3+2, and simultaneous 5-axis machining based on the work each process needs to perform.
FAQ
1. What Is a 3-Axis CNC Milling Machine Used For?
A 3-axis CNC milling machine is used for machining flat surfaces, pockets, slots, holes, contours, brackets, plates, housings, and other components with features accessible from its available tool direction. It is widely used in general manufacturing, automotive production, industrial equipment, and other machining applications.
2. What Materials Can a 3-Axis CNC Milling Machine Cut?
Depending on the machine’s spindle, rigidity, tooling, and cutting parameters, a 3-axis CNC mill can machine aluminum, carbon steel, alloy steel, stainless steel, copper, brass, and engineering plastics. Some machines can also process titanium alloys and other difficult materials when properly configured.
3. Can a 3-Axis CNC Machine Make Complex Parts?
Yes. A 3-axis CNC machine can produce many parts with complex pockets, profiles, and machined surfaces. However, parts with multiple angled faces, deep cavities, undercuts, or continuously changing surface geometry may require special fixtures, multiple setups, or multi-axis machining.
4. What Is the Main Difference Between 3-Axis and 5-Axis CNC Milling?
A 3-axis machine uses three linear movements: X, Y, and Z. A 5-axis machine adds two rotary axes, allowing the tool or workpiece to be positioned at different angles. This can improve access to multiple faces and complex surfaces and may reduce the number of setups required.
5. Is a 5-Axis CNC Machine Worth the Investment?
It depends on your parts and production requirements. A 5-axis machine may be worthwhile if you frequently machine multiple faces, compound angles, or complex contours, or if repeated setups are adding significant cost. For straightforward parts that can be produced efficiently with three axes, a 3-axis machine may remain the more economical option.
Originally published by DEPU on 10 Nov 2026.